Photogrammetry Results from the Jemez Historical Site, Jemez New Mexico
Data Sets
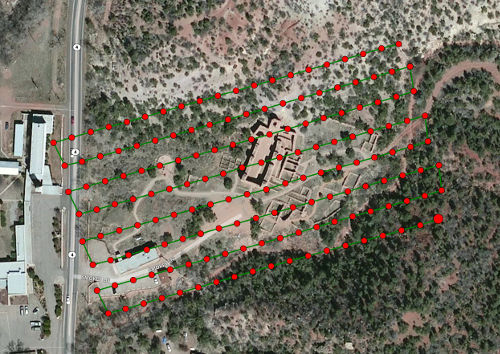
GPS data included
January 20th, 2018, 12:16pm-12:31pm
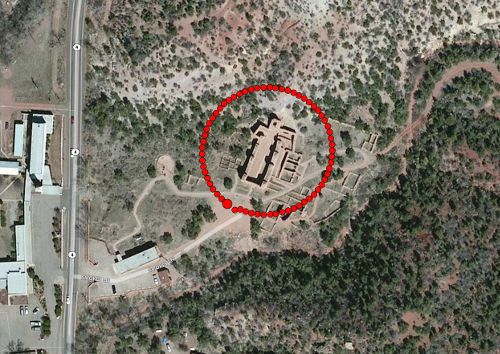
GPS data included
January 20th, 2018, 1:29pm-1:33pm
_500.jpg)
No GPS data
January 20th, 2018, 2:20pm-2:51pm
Models
First, Pix4D is a piece of commercial software and is very easy to use. It requires little more than create the project, select the folder with the pictures, and push go. The second stage can use a large amount of RAM.
Second is a combination of COLMAP for image feature extraction, matching, and sparse reconstruction; followed by OpenMVS for dense reconstruction, meshing, and texturing. The biggest challenge with this pipeline is that while both COLMAP and OpenMVS support the fisheye lens on my drone, the export/import path between them does not. I currently run COLMAP to completion using the SIMPLE_RADIAL_FISHEYE lens model and spatial matching since I have GPS data, export "undistorted images" with a min_scale setting of 0.8, then close and reopen COLMAP. I then create a new project and use the undistorted images as the input and the SIMPLE_RADIAL lens model, run COLMAP a second time, and export the *.nvm file. This seems a bit silly, so I am looking for a better way.
OpenMVS is fairly straight forward. Import in the *.nvm, then Densify the point cloud, mesh the densified cloud, then texture the mesh. This can use a huge amount of RAM.
The *.obj files are just as the software left them. The Blender files have the model straightened with Z-up and a infinite light source (sun) set up approximately as the sun was when the photos were taken.
Now, as fow what model to use, the best looking model of the main cathedral seems to be the circular mission processed by COLMAP and OpenMVS. However, everything else is sub-par due to poor camera coverage. Also, both of the COLMAP-OpenMVS models are very large and may overload normal computers. For general usage, the grid mission processed by Pix4D would be my first choice.
_500.jpg)
Download *.blend (18MB)
*.stl for 3D printing
Download *.stl (7MB)
_500.jpg)
Download *.blend (98MB)
)_500.jpg)
This is the highest quality main building, but everything else suffers.
Download *.blend (374MB)
_500.jpg)
This is my first choice for general usage.
Download *.blend (114MB)
)_500.jpg)
Download *.blend (684MB)
The computer with Pix4D installed will need more RAM to complete this task. That may take awhile. Shown is the point cloud that Pix4D creates at the end of the sparse point cloud generation step. It looks very promising.
Video
_snapshot_500.jpg)